11. Test Your Methods
Test Your Methods
You'll test your methods in a Jupyter Notebook before applying them in "autonomous mode" in the simulator. To do this, you'll run your analysis on data that you've recorded in "training mode".
Online option:
We are now moving towards online workspaces, which is great news for you! You do not need to worry about installing anything and get to focus on the material taught in this lesson. Getting started is easy, in fact, all you have to do is go to the next concept!
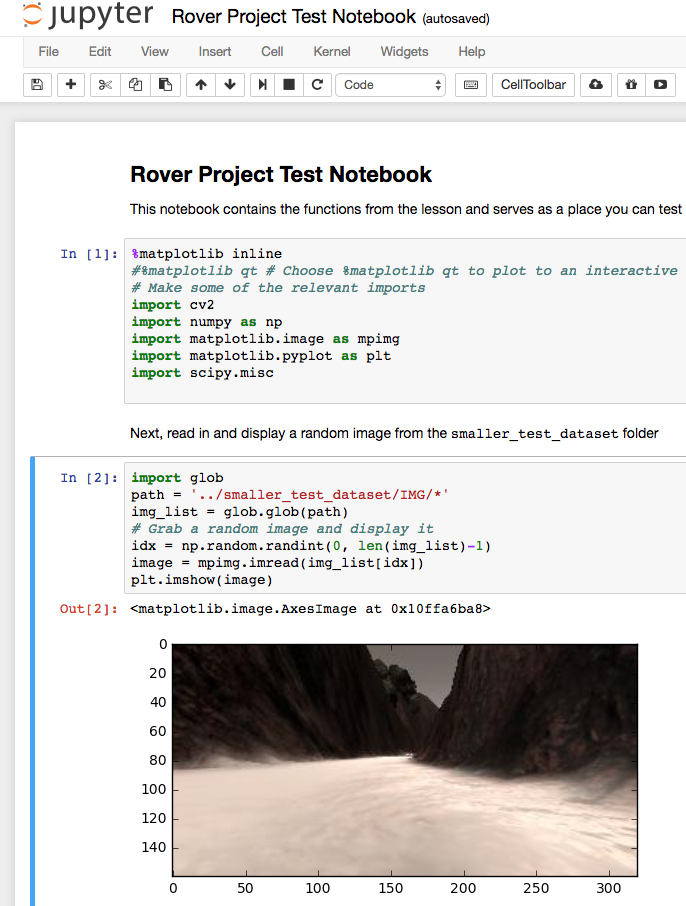
The notebook contains all the functions from the lesson and a couple extras to run tests and output video from data saved in training mode on the simulator. Try running the notebook and see how the various functions work.
At the end of the notebook fill in the process_image() function to superimpose your map onto the ground truth worldmap!
If you're unfamiliar with how to operate in a Jupyter Ipython Notebook, check out this free short course on Anaconda and Jupyter provided by Udacity.
If you would like to run and try the lab locally check out the instructions below for the local implementation.
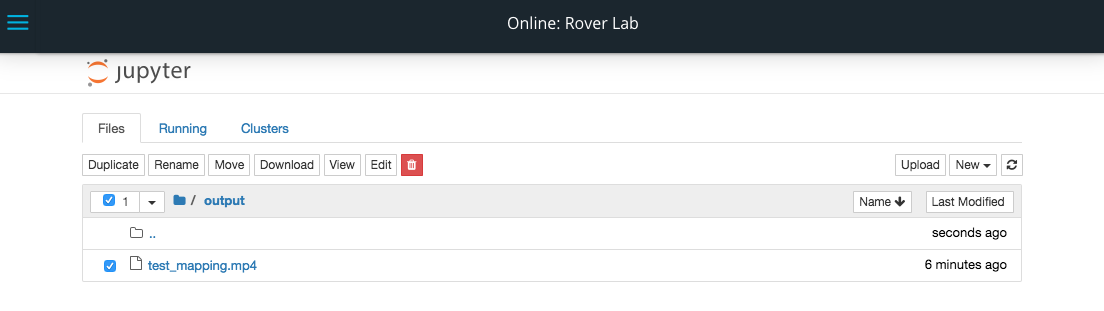
How to download the output video
After you generated the output video, you could download it from the Jupyter Notebook by clicking File -> Open... then navigate to /output/ folder. Select the .mp4 file and download!

Local option:
We will be hosting the projects for this program in GitHub repositories. If you are unfamiliar with Git and GitHub you can get up and running quickly using their tutorial or by taking this free short course on using GitHub from Udacity.
To get started with the project you should git clone the project repository to your local machine, or just download it directly if you don't have a GitHub account.
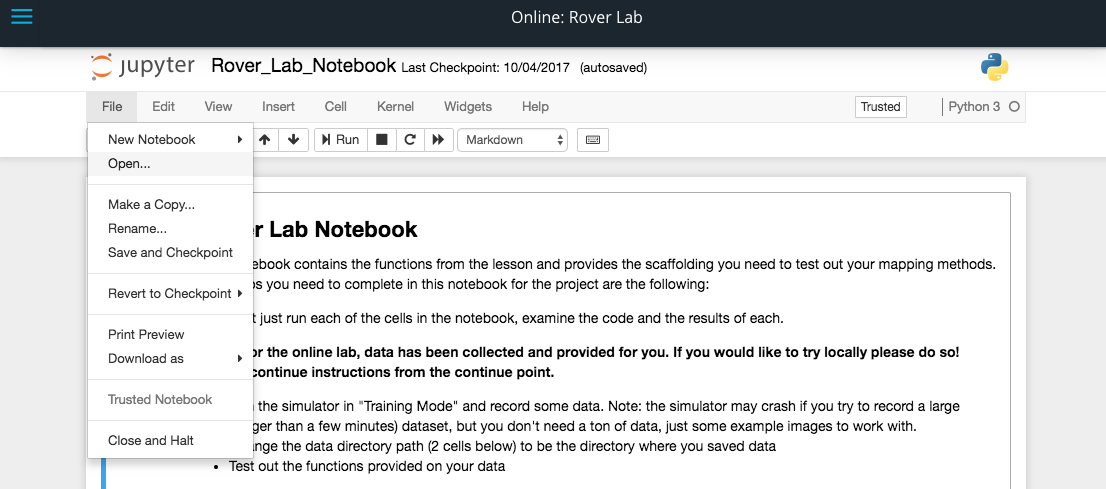
In the repository, you'll find an Jupyter Ipython Notebook called Rover_Project_Test_Notebook.ipynb. Assuming you have installed the RoboND-Python-Starterkit, launch the Jupyter Notebook server at the terminal like this:
jupyter notebook In the browser window where Jupyter launches, navigate to the directory containing the Ipython notebook and open it. It should look something like the image at the top of the page. If you're unfamiliar with how to operate in a Jupyter Ipython Notebook, check out this free short course on Anaconda and Jupyter provided by Udacity.
The notebook should run as-is so long as it resides in the same directory structure as in the project repository. The notebook contains all the functions from the lesson and a couple extras to run tests and output video from data saved in training mode on the simulator. Try running the notebook and see how the various functions work.
At the end of the notebook fill in the process_image() function to superimpose your map onto the ground truth worldmap!
Rover Lab
Task Description:
Check the tasks on the list when you completed them in the Rover Lab Jupyter notebook!
Task Feedback:
Good job! You are already half way through the project!